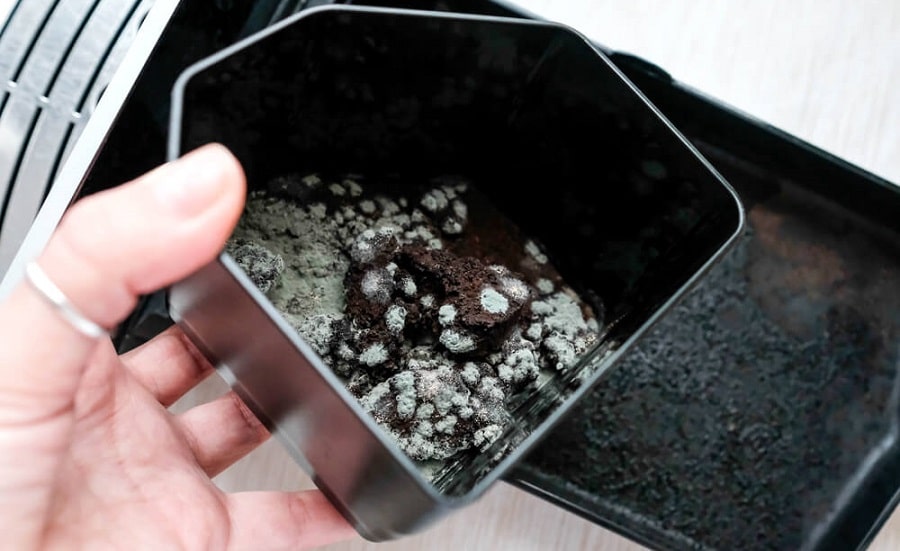
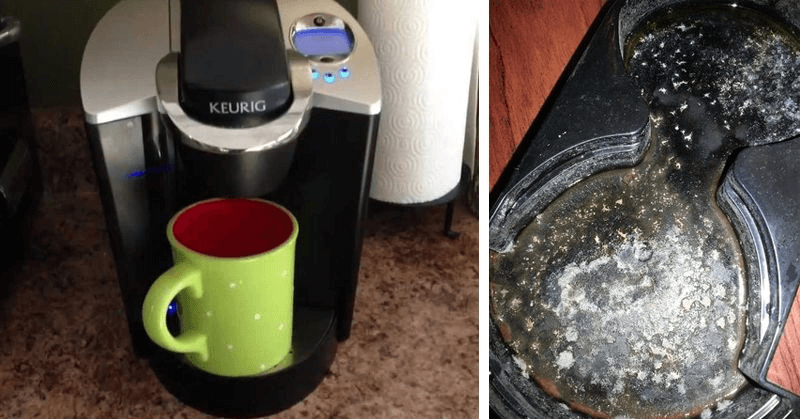
Looking for tips on cleaning mold from your Keurig reservoir? Look no further! In this article, we'll provide you with a step-by-step guide to safely and effectively remove mold from your Keurig water reservoir and tips on how to prevent mold growth in the future. Say goodbye to moldy coffee and hello to a clean Keurig!
As a coffee lover, you know how important keeping your machine clean and running smoothly is. One of the most common issues that Keurig owners (or other drip coffee machines) face is mold growth in the water reservoir. Apart from ruining your coffee experience altogether, mold can also harm your health. It can produce mycotoxins, which can lead to a range of health issues when consumed, including:
- Nausea
- Vomiting
- Diarrhea
- Stomach cramps
- Headache
- Respiratory problems
Luckily, cleaning mold from your Keurig reservoir is a simple process that can be done at home with a few basic supplies. This article will guide you on safely and effectively cleaning mold from your Keurig reservoir and ensuring your coffee stays delicious and mold-free.
Why Need to Cleaning the Keurig Water Reservoir?

Mold formation occurs when moisture is allowed to sit in warm, dark, and damp conditions, particularly in the water reservoir. If left unchecked, they can infiltrate the water used in espresso machines, resulting in contaminated coffee. Ingesting such coffee can have numerous negative health implications, from nausea and cramping to vomiting.
Cleaning the reservoir regularly rids it of any hazardous contaminants, such as mold and bacteria. This not only makes your coffee safe to consume but also promotes good health and decreases the chances of any illnesses associated with consuming contaminated coffee.
It is also beneficial to keep the Keurig water reservoir clean, as it can help extend its lifespan. The buildup of mold and bacteria in the reservoir may cause blockages and lead to machine malfunctioning. Routine maintenance and cleaning are the keys to keeping your Keurig in top shape. This can prevent some of the problems that arise and help it run more efficiently.
Note: Using tap water instead of distilled water contributes to mold growth as it contains minerals such as lime, chalk, calcium, and magnesium.
Parts of Keurig Coffee Maker
They can vary in design and features, but most models have the following parts:
- Water reservoir: It is the part that holds the water used to brew the coffee. It sits at the back of the machine and can be removed for easy filling.
- Brew basket: The brew basket is where you place the K-cup. It is usually located at the top of the machine and designed to securely hold the K-cup in place during brewing.
- Brew head: It is part of the machine that pierces the K-cup and injects hot water into it to brew the coffee. It is located at the top of the machine and is visible when the brew basket is open.
- Drip tray: The drip tray sits at the tray at the bottom of the coffee maker. It catches any excess water or coffee that drips out during brewing.
- Control panel: The interface on the coffee maker allows you to select the size and strength of your coffee, as well as other options like temperature control and automatic shut-off.
- Pump: It pumps water from the reservoir into the brew head, where it is injected into the K-cup to brew the coffee.
- Heating element: This part heats the water to the desired temperature for brewing coffee.
Cleaning the Keurig Reservoir
Keurig recommends doing it every three to six months.
1. Preparation
- Unplug your Keurig machine and remove the water reservoir.
- Empty any remaining water from the reservoir.
- Disassemble the machine by removing any detachable parts, such as the lid, drip tray, and filter, if any.
- Wash the brew basket and drip tray separately with warm, soapy water.
- Make sure to wipe them with a microfiber cloth.
- Reassemble the clean parts back.
2. The Items Needed
- Keurig descaling solution or white vinegar
- Water
- Scentless soap
- Soft-bristled brush
- Microfiber cloth
- A mug big enough to collect the discarded solution
3. Cleaning Steps
You could use the recommended Keurig descaling solution or white vinegar.
Cleaning Using Keurig Descaling Solution
- The cleaner contains 14 oz of descaling solution. Mix this with an equal amount of water.
- Let the mixture brew until the reservoir is empty.
- Remove the tank and rinse it.
- Fill it with water to do a freshwater rinse
- Rerun the brew cycle until the water is depleted.
Cleaning Using White Vinegar
- Fill the reservoir halfway with distilled white vinegar.
- Fill the remaining part of the reservoir with water up to the allowed maximum.
- Gently mix the solution and let it sit for 15 minutes.
- Use your brush to clean the reservoir and discard the solution.
- Fill it once more with the water and vinegar mixture.
- Run the Keurig through a brewing cycle with no K-cup. Brew until the reservoir is empty.
- Repeat the brewing cycle with clean water to rinse any leftover vinegar taste and residue.
- Clean the outside of the reservoir with soap and a soft-bristled brush or microfiber cloth.
4. Final Steps
- Clean the exterior of the Keurig machine with soap and water.
- Wipe down the machine with a clean, damp cloth.
Tips for Preventing Mold Growth in Keurig Reservoir

1. Clean Your Keurig Regularly
Light clean your machine every week between the normal process described above.
- Fill the reservoir with water.
- Put a Keurig Rinse Pod where you would typically put your K-cup.
- Set it to brew.
- When done, discard the solution.
- Repeat this with only water and no rinse pod.
In addition to the light cleaning, this also helps to avoid mixing flavors.
2. Use Filtered Water
Use filtered water to reduce the bacteria and minerals accumulating in your Keurig reservoir, reducing the chances of mold growth.
Alternatively, you can use the Keurig filter cartridge to remove chlorine.
3. Empty and dry the reservoir
After each use, empty the water from the reservoir and leave it open to air-dry completely. This will help prevent any moisture from accumulating and prevent mold growth.
4. Store your machine in a dry place
If you're not using your Keurig regularly, store it in a dry and well-ventilated place to prevent mold growth.
Final thoughts
Cleaning mold from your Keurig water reservoir might not be the most glamorous task, but it's certainly important for the health of both you and your coffee machine.
Remember to take preventative measures and regularly clean to avoid unwanted surprises in your morning cup of joe. With these tips, you can keep your machine clean, leaving you with a happy coffee-making experience. Happy brewing!